Industry News

How to Use Microsoft Teams For Project Management
- Adding team members
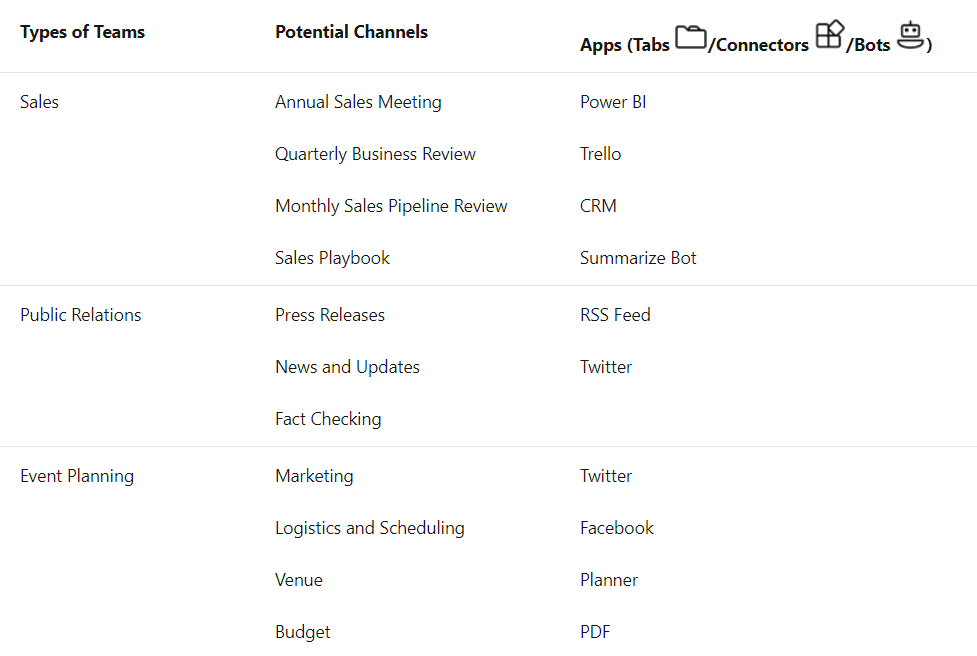
- Creating channels (explained in next section)
- Uploading and creating files
- Adding tabs, such as Planner and SharePoint
- Connecting third-party and apps
Step 3: Communicating with Team Members
Communication is essential to project successes, lucky for us, Teams has many ways that we can keep an open line of communication with other team members such as:
- Starting a new conversation
- Replying to a conversation thread
- Reacting to a message
- Editing and deleting messages
- @ mentioning team members
- Video-Call team members
If you are planning on getting together for a group video call, scheduling a time that works for everyone can be difficult. Luckily there is a handy tool called Find Time that allows invitees to vote on dates and times that work best with their schedule.
Step 4: Task Management
Now that you have set your teams and channels up – the next step is to organize tasks. We use Microsoft Planner for task management, which can be linked to the team as a channel tab. Microsoft Planner allows your team to create plans, organize, assign, and collaborate on tasks. You can track your team’s progress from a visual dashboard and get updates via email notifications. See below for a brief overview of some of Microsoft Planners' key features.
- Add Tasks
- Add a description to your tasks
- Mark tasks according to priority (such as urgent, important, medium, or low).
- Add checklists – essentially to-do lists within each task
- Enter a start date and a due date (and get notifications for approaching deadlines)
- Add relevant files
- Enter comments about the task
- Assign tasks to members of the team (one or multiple people)
Step 5: Monitoring
Throughout the project life cycle, you will be able to monitor the budget, scope, and outstanding tasks for the project team using Microsoft Planner through these areas:
Project Hub – With all your projects in one place, you can track your tasks for one or multiple projects as well as your team's progress. This makes it easy to see if you're on track for project completion.
Task Acceptance – If you are a project manager, you can assign tasks to team members, see if they have accepted the task, and commit to the work. This way you can see who is responsible for what and there is no confusion.
Task Triggers – Once one task is completed, a notification is sent to the person working on the next ‘step’ of that task. This keeps workflow moving.
File Storage – Task management software allows you to store any files, images, spreadsheets, and project-related content so you can ensure you are working with the most up-to-date version. If you can attach specific files to specific tasks, that’s even better, as it will help further reduce any confusion about which information corresponds to which task.
Step 6: Project Closure
Once all tasks have been completed and the deliverables have been met, you can review and summarize the project to see where your strengths are and where you can improve for future projects. Rather than archiving or deleting the team, we recommend leaving it open as an open line of communication to the client (if it’s not an internal project)
Want to set your team up for success using Microsoft Teams?
We can help! Reach out today to learn more about this powerful tool.
Subscribe to Our Blog
Stay up to date with the latest technology and industry trends
Contact Us